AN 80’S MASTER BATH REMODEL
Last week I walked you guys through the complete remodel of my dated 90’s kitchen. You can read about it here: A 90’S KITCHEN MAKEOVER
This week, I am continuing the theme and attacking the master bath. My master bath.
So, originally, the master bath was the ONLY room in the house that my partner Natalie and I were going to tackle. But, once we decided to replace the floors in the master bath, (Porcelanosa, Hampton Brown) that broke the seal on a can of some very expensive worms.
Me: I’m not redoing the floors in the bathroom unless we do the whole house
Natalie: OK
Me: And since we are doing all the floors we should probably redo the kitchen…
Natalie: OK
Me:…and the fireplace.
Natalie: OK
Me: And the guest bath
Natalie: (Reaches for the bottle of Jack) OK
End scene.
Isn’t Natalie great? Let’s give her a hand everybody. Thank you, Natalie.
So without further ado, here we go. THIS.....is the space.
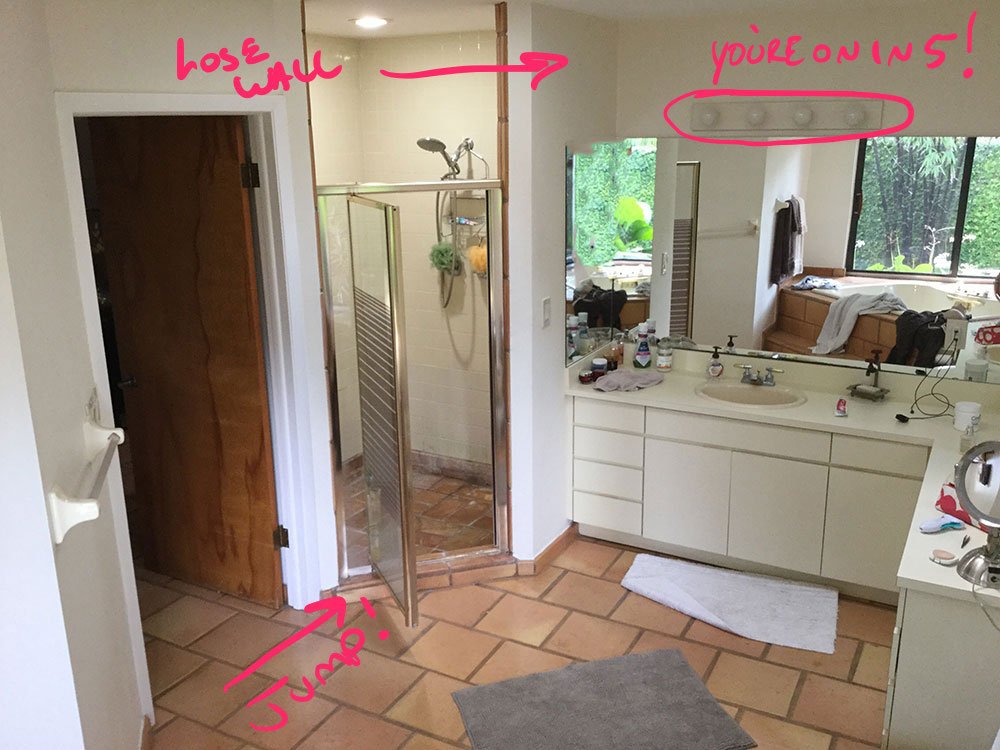
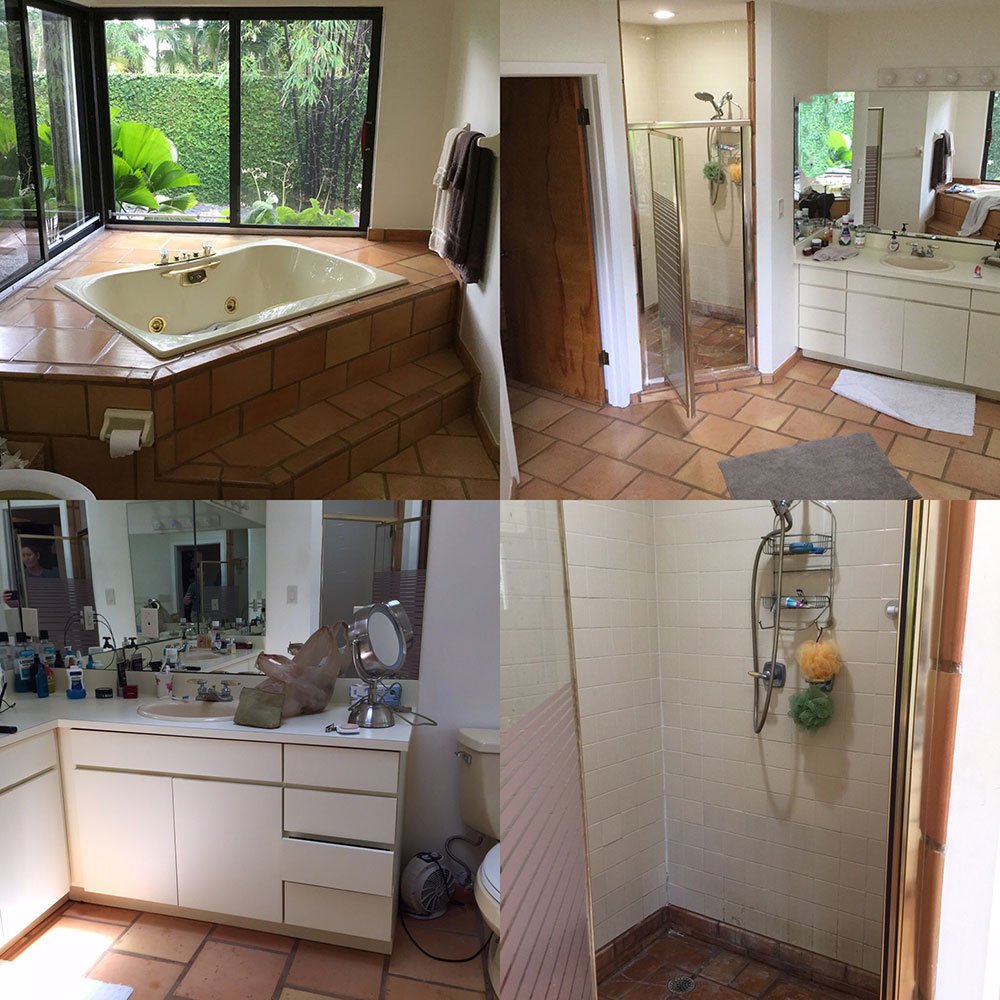 Obligatory Before Photos Part Deux
Now granted, it's messy but, seriously 80's, what were you thinking? Besides the glaring style offenses, this bathroom had seen better days. Cabinets were broken, tiles were broken, and whoever decided Saltillo would make a great shower floor...a pox on thee!
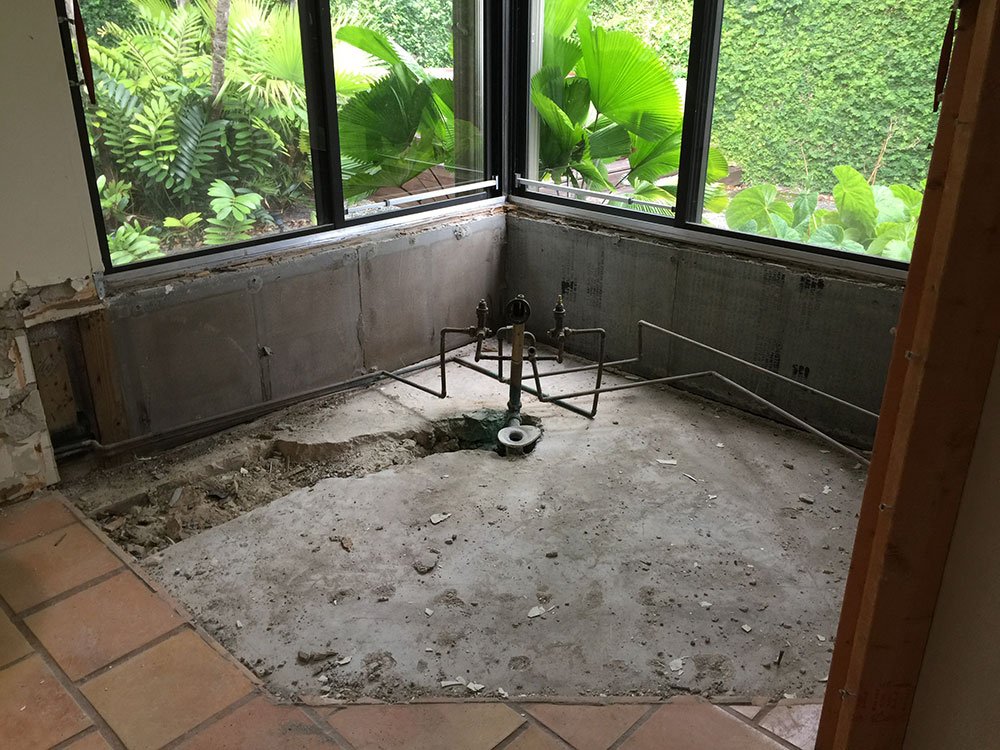
Removing Tub Mountain
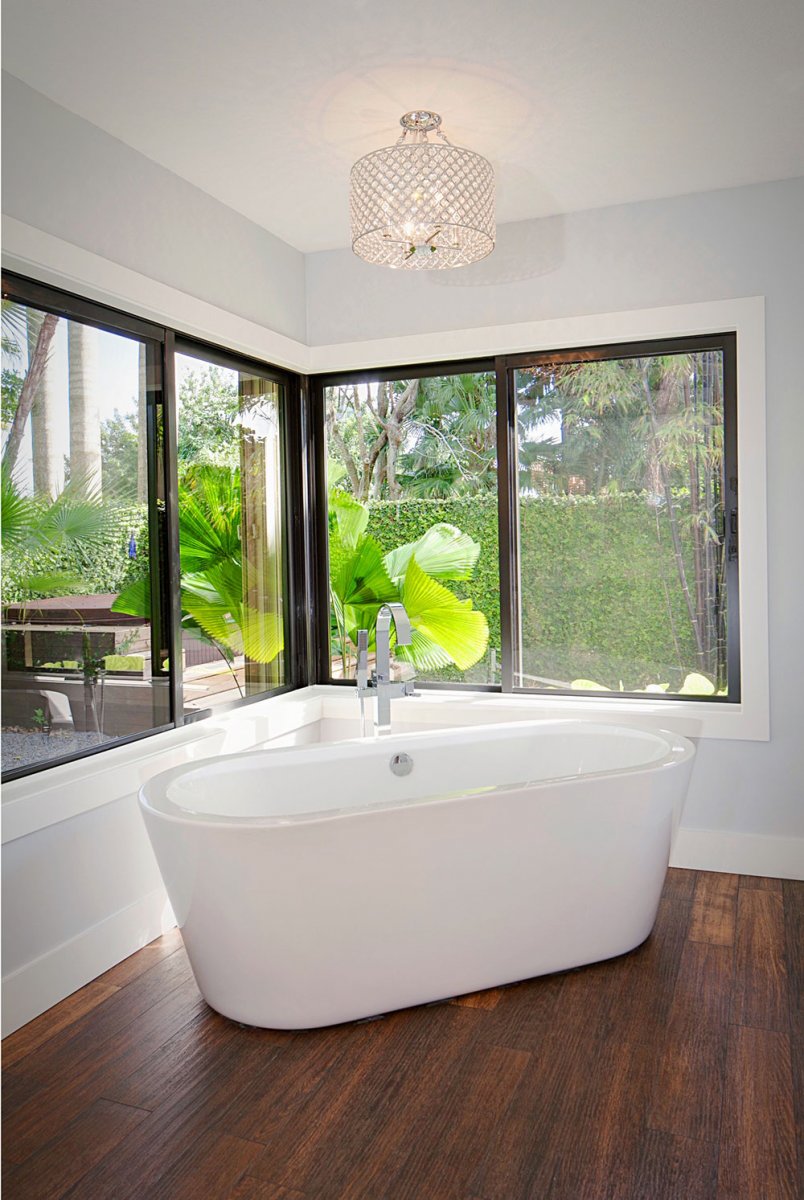
We decided the floor plan would remain essentially the same. The current layout worked for us but that mountain of Saltillo and (non-functioning) spa tub needed to be demolished with extreme prejudice.
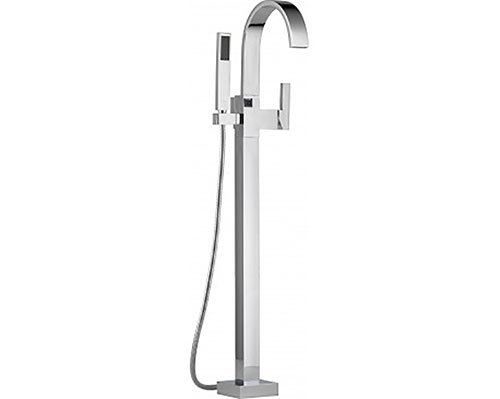
To replace the dysfunctional spa tub, I chose a freestanding model from Wyndham. The "Mermaid," to be exact. I found this tub (after looking at plus 3K tub after plus 3k tub) on ....wait for it.....AMAZON!! I know, I know. That seems kind of risky and it probably is. But the reviews and ratings were right, the price was right and style was perfect.
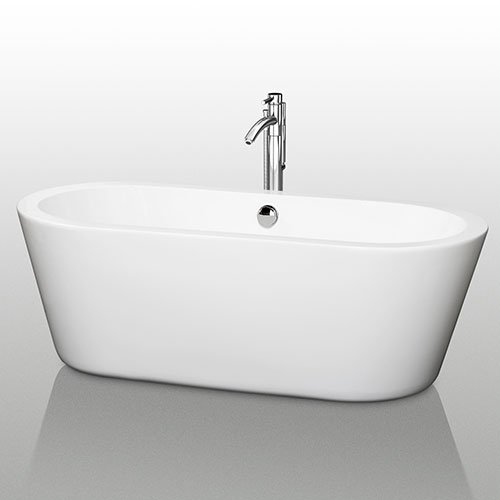
Since I saved a ton of dough on the tub, I decided to splurge on the tub filler. (This is a trick I like to use to stretch a budget and make a finished space look more expensive than it really is). I chose the Brizo Siderna and it's a stunner. How much of a splurge? Let's just say it was more than the tub.
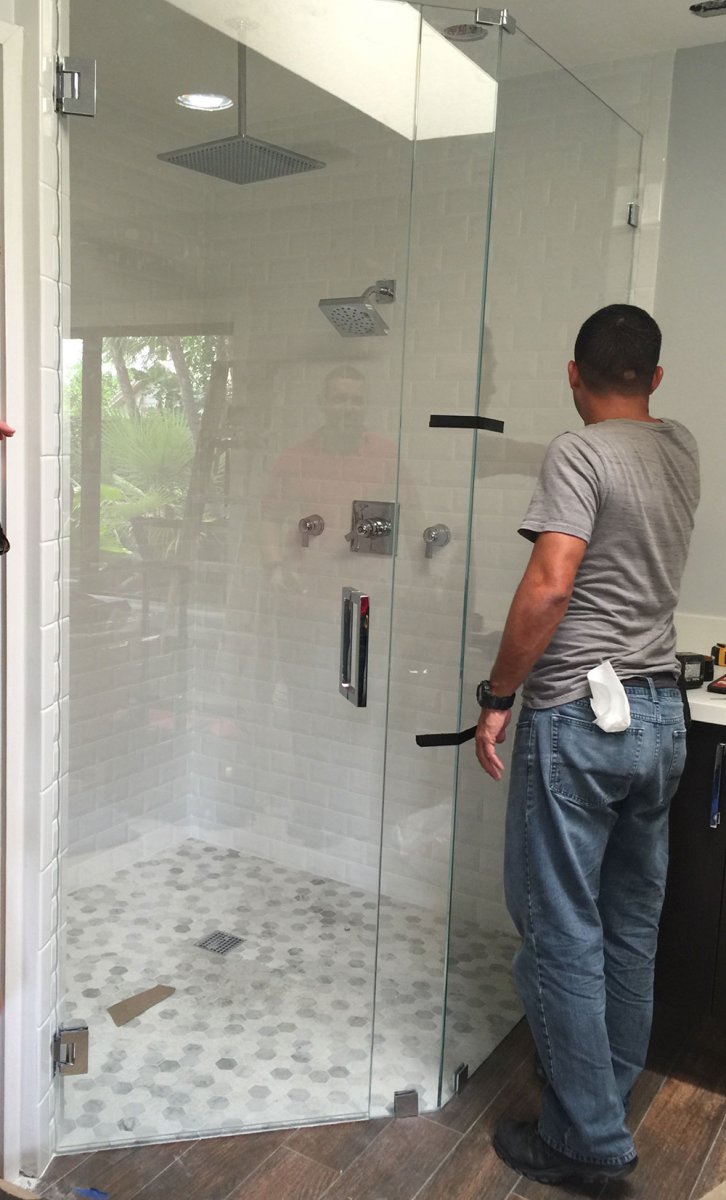
The Shower
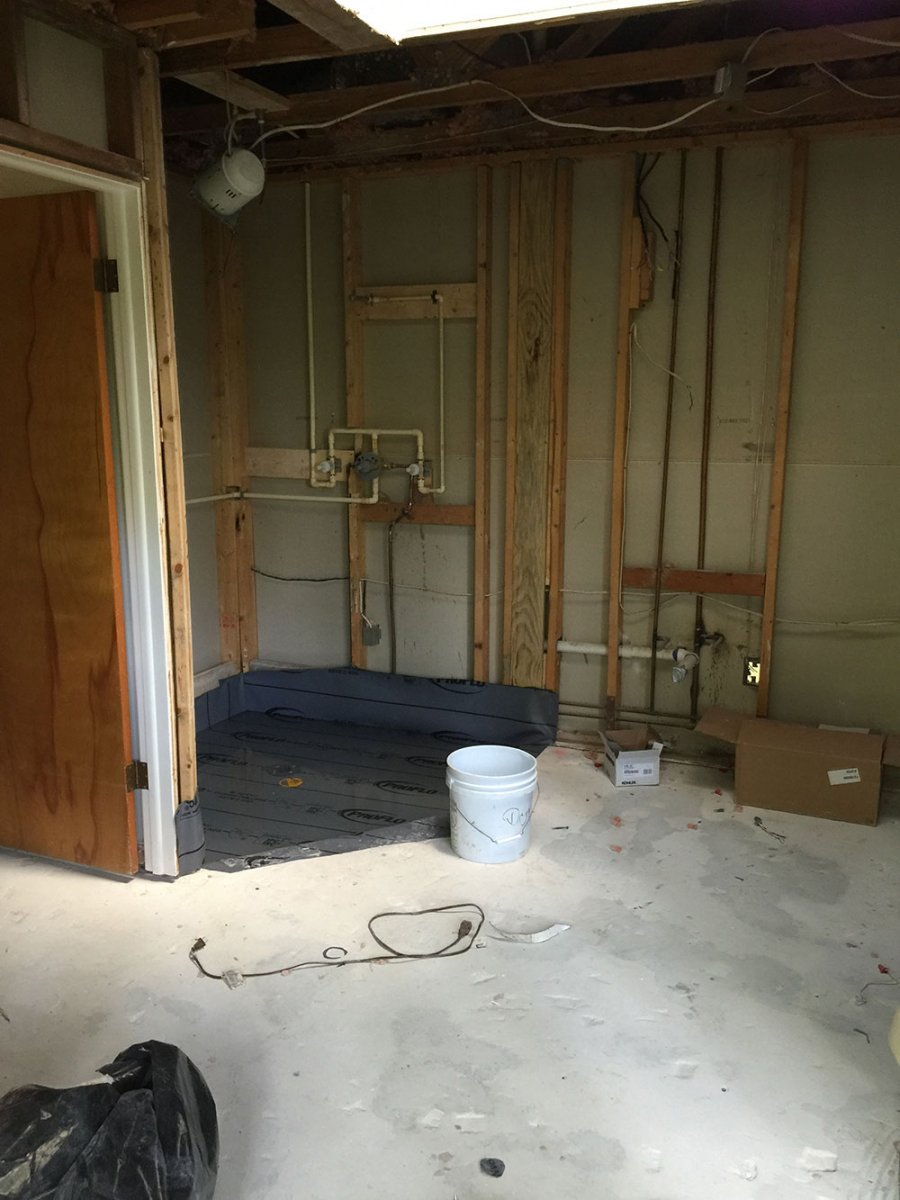
The shower was a little trickier than the tub. I really really really wanted a zero entry (or curbless) shower and (Hooray!) Natalie did as well. I just love the look and there's no trip hazard, which is especially important if you plan to "age in place" in your home. DESIGN TIPS FOR AGING IN PLACE That also meant we had to bring in some cement to fill in the shower pan and bring it up to the surrounding floor level. A slight, almost imperceptible slope towards the drain keeps the wet stuff going in the right direction.
 Look at that shower hurdle! Say goodbye, shower hurdle...
Another issue I solved with a sledgehammer is that claustrophobic, side shower wall. Before, showering was hit or miss because the lighting (or lack thereof) was dismal. I am sure we smell better these days. Pretty sure. Mostly.
 Peace out, wall! Look how open it is now!
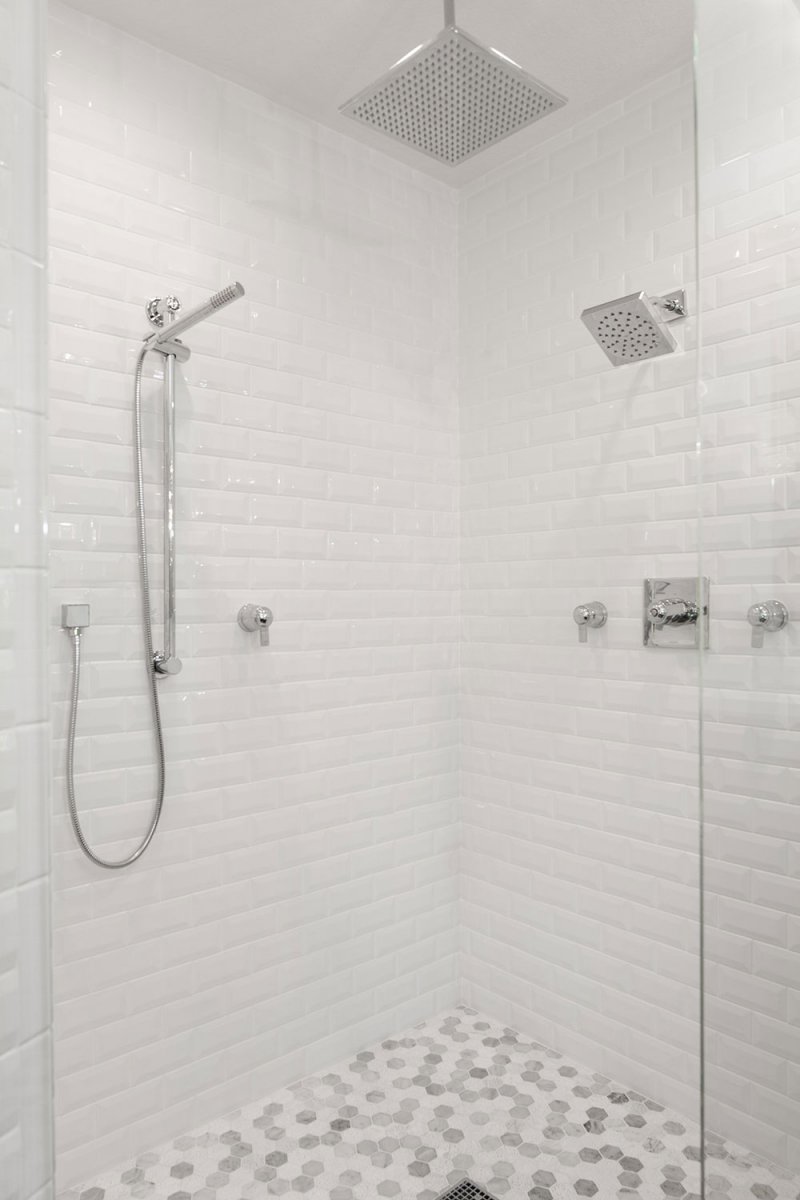
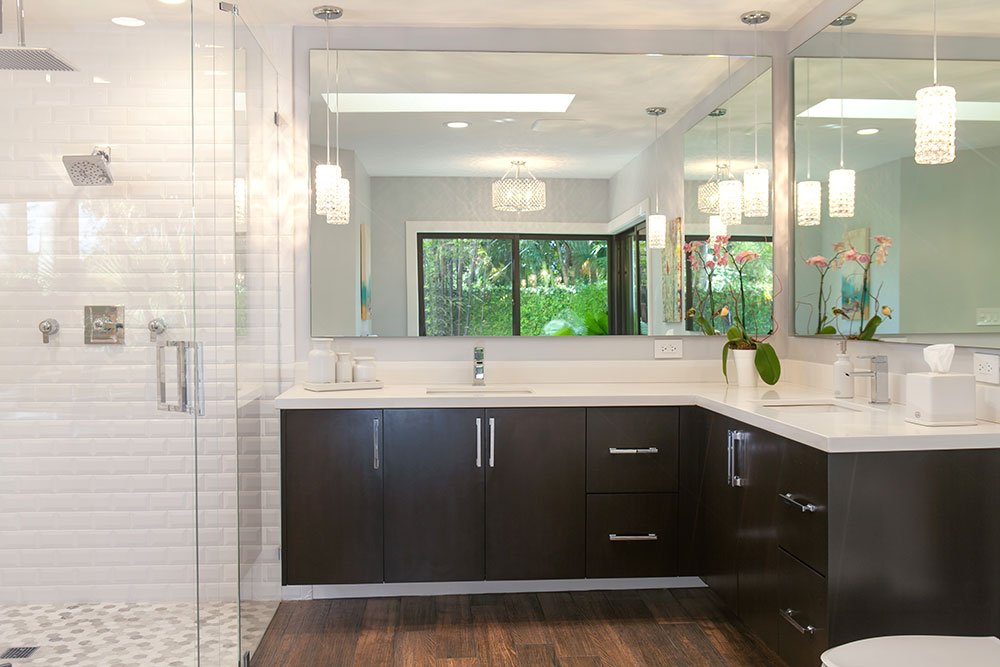
My overall concept for the master bath was that of an elegant and glam yet contemporary space. I wanted it to compliment but soften the adjoining master bedroom which has a darker, more masculine feel. (Bedroom Pic) For the shower floor, I chose a classic, hex marble mosaic. The shower walls needed to be simple...classic. White, beveled subway tile fit the bill.
For the fixtures, (sinks and shower) I chose quality (but budget friendly) Moen 90 Degree fixtures in chrome, sans one; a 12 inch, chrome rain head by Aqua Brass (P.S. chrome will save you a butt-load of money over other finishes).
 Look, Ma! No curbs!
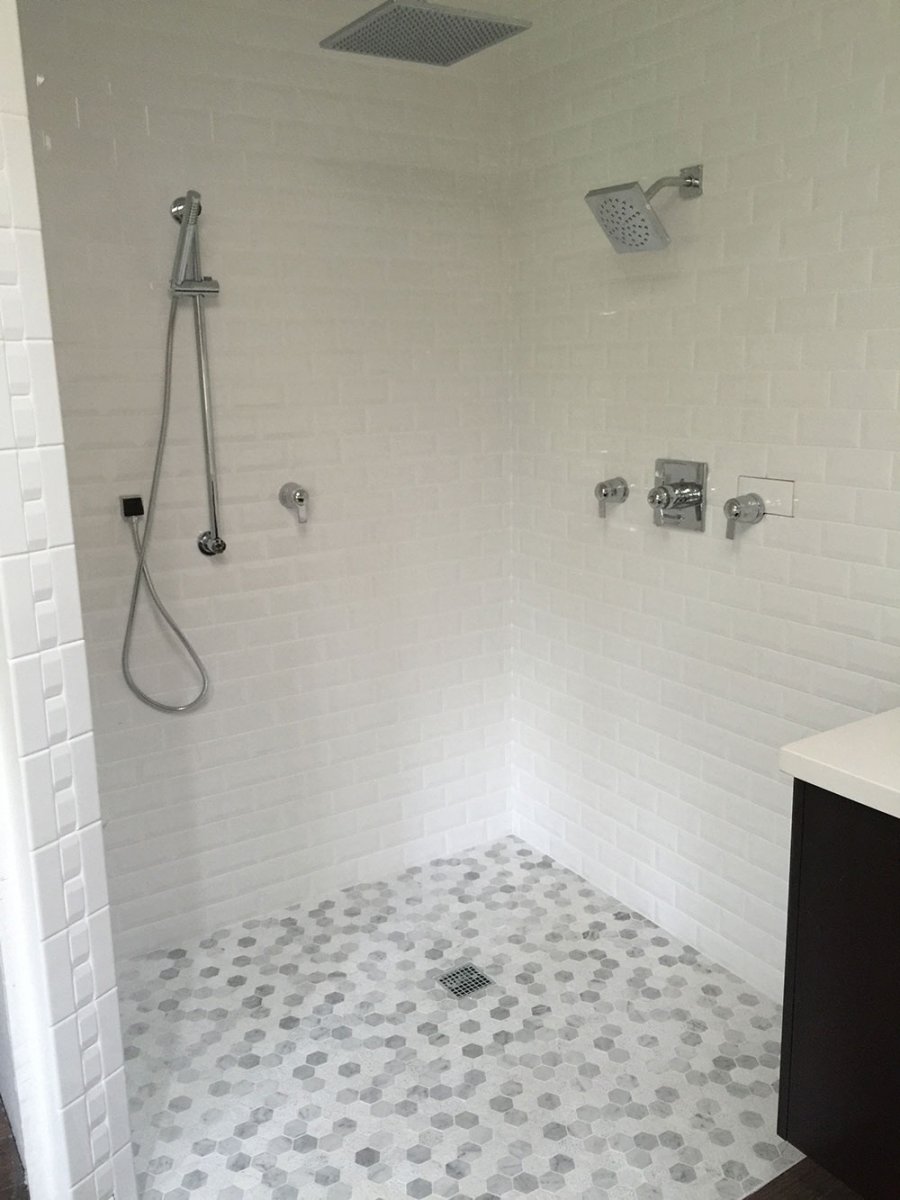
A frameless, glass enclosure finished off the structure of the new shower. We sprung for the more expensive Sapphire glass which has way less iron content than the normal stuff. Otherwise, there would have been a slight green tint (think of a glass edge or a coke bottle) and I couldn't have that with all the sparkly, glamorous white. Of course, I couldn't.
The Vanities
I have a thing for dark. With all the white going on, I wanted some contrast (aside from the flooring) so I went full contemporary and dark on the custom built, wood vanities. I also decided to make them "floating vanities." I just love the look juxtaposed with the more traditional finishes. And heck! We paid a lot for that floor! I want to see every last plank. For the countertops, a simple, white quartz did the trick.
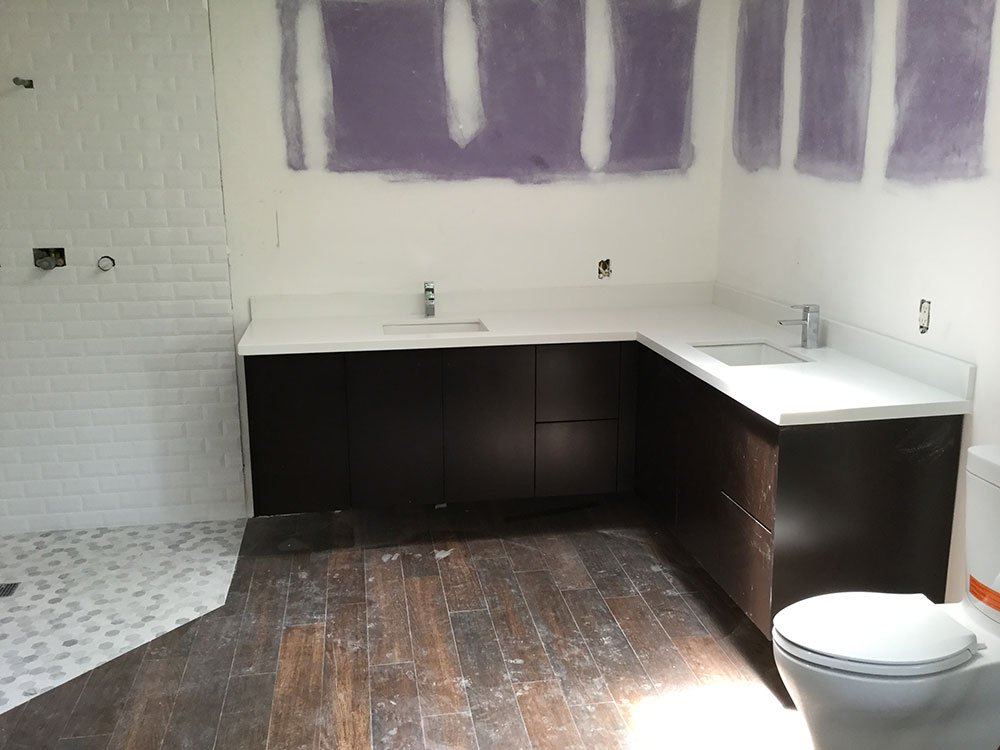
New vanities going up and a good look at the new, Porcelanosa flooring. A little messy now but wait...(Don't worry. It's tile. Shhhhh)
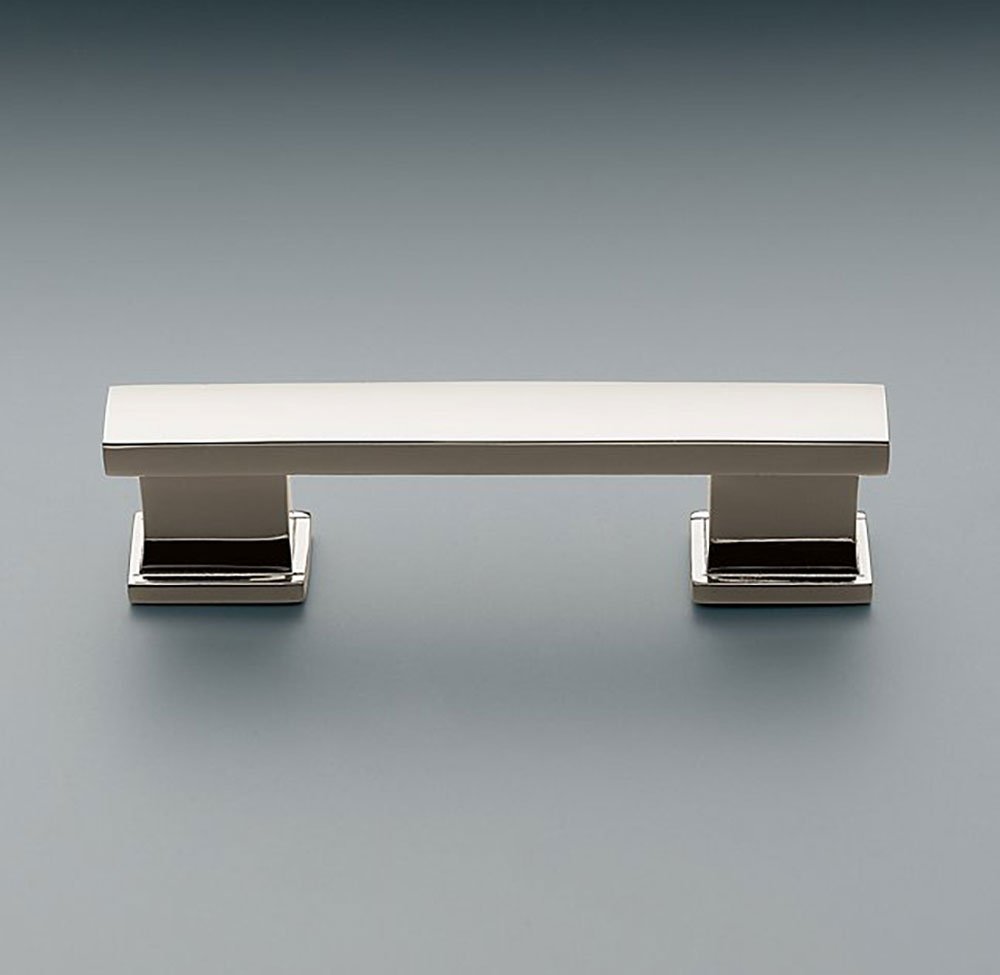
The job of vanity hardware was awarded to Restoration Hardware's Strande Pull.
 Isn't she a looker?
To finish off the bathroom (and my budget) I chose ridiculously affordable pendant lights from Wayfair and a ridiculously inexpensive chandelier from Overstock. They were blingy and shiny. Will I upgrade them someday? Probably, but for now, they look pretty fab. You can see them in the after pics right......NOW!
The End Result...
So what do you think? Please comment below.
Are you over your dated bathroom and need some guidance? Give us a call. We got you.
Don't forget to follow Darla Powell Interiors on Instagram, Facebook and Twitter - links to the right.
Thanks for reading. See you next week!